Introduction
I never thought my ATX desktop was loud until I built a small ITX machine. Placed side by side, the difference was obvious: what I used to complain about as “noisy” suddenly felt quiet in comparison.
The motherboard’s built-in fan control offers very limited options — usually based on motherboard or CPU temperature. I had lowered fan speeds for low CPU temperatures, but it made almost no difference. The issue could be the BIOS from Maxsun or simply that the case fans aren’t suited to fine-grained control.
In reality, case fans rarely need to run at high speed except under specific loads, most notably when the GPU is under heavy load. The motherboard isn’t the main heat source; it only heats up indirectly. Using the motherboard temperature to drive case fans introduces lag and inaccuracy. Ideally, case fans should respond to GPU temperature, but you can’t configure that in the BIOS.
So I looked for alternatives and found a small tool on GitHub called FanControl. It turned out to be feature-rich and solved my problem — worth a quick write-up.
Fan Speed Control
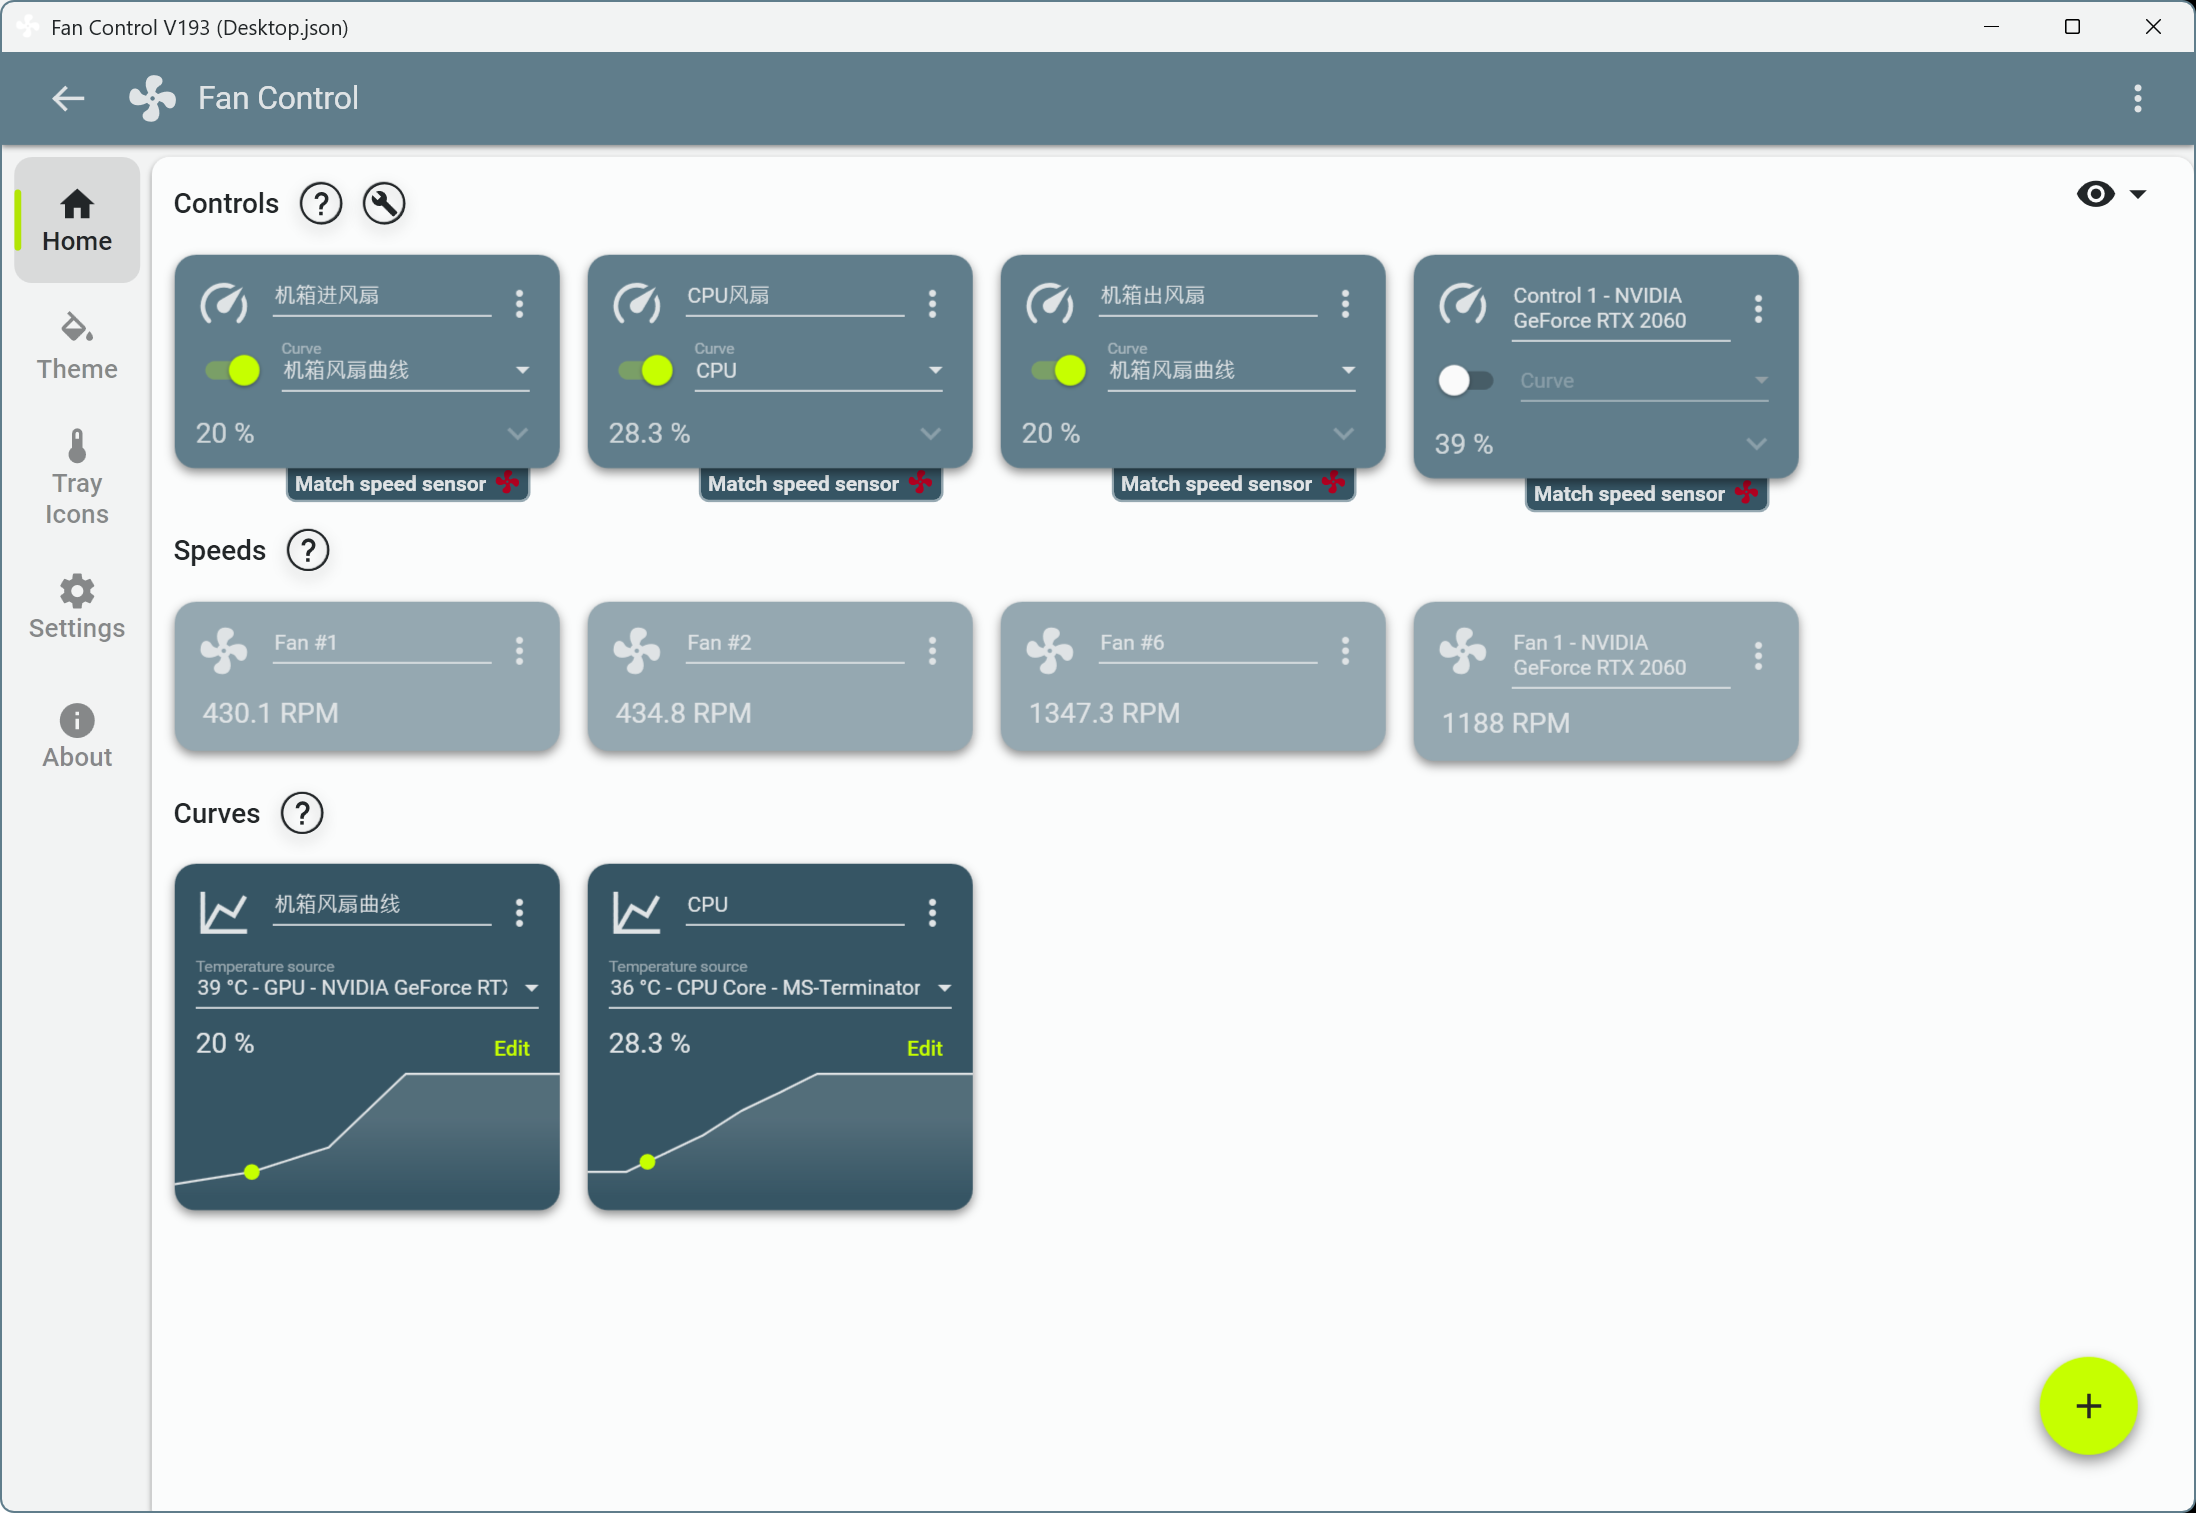
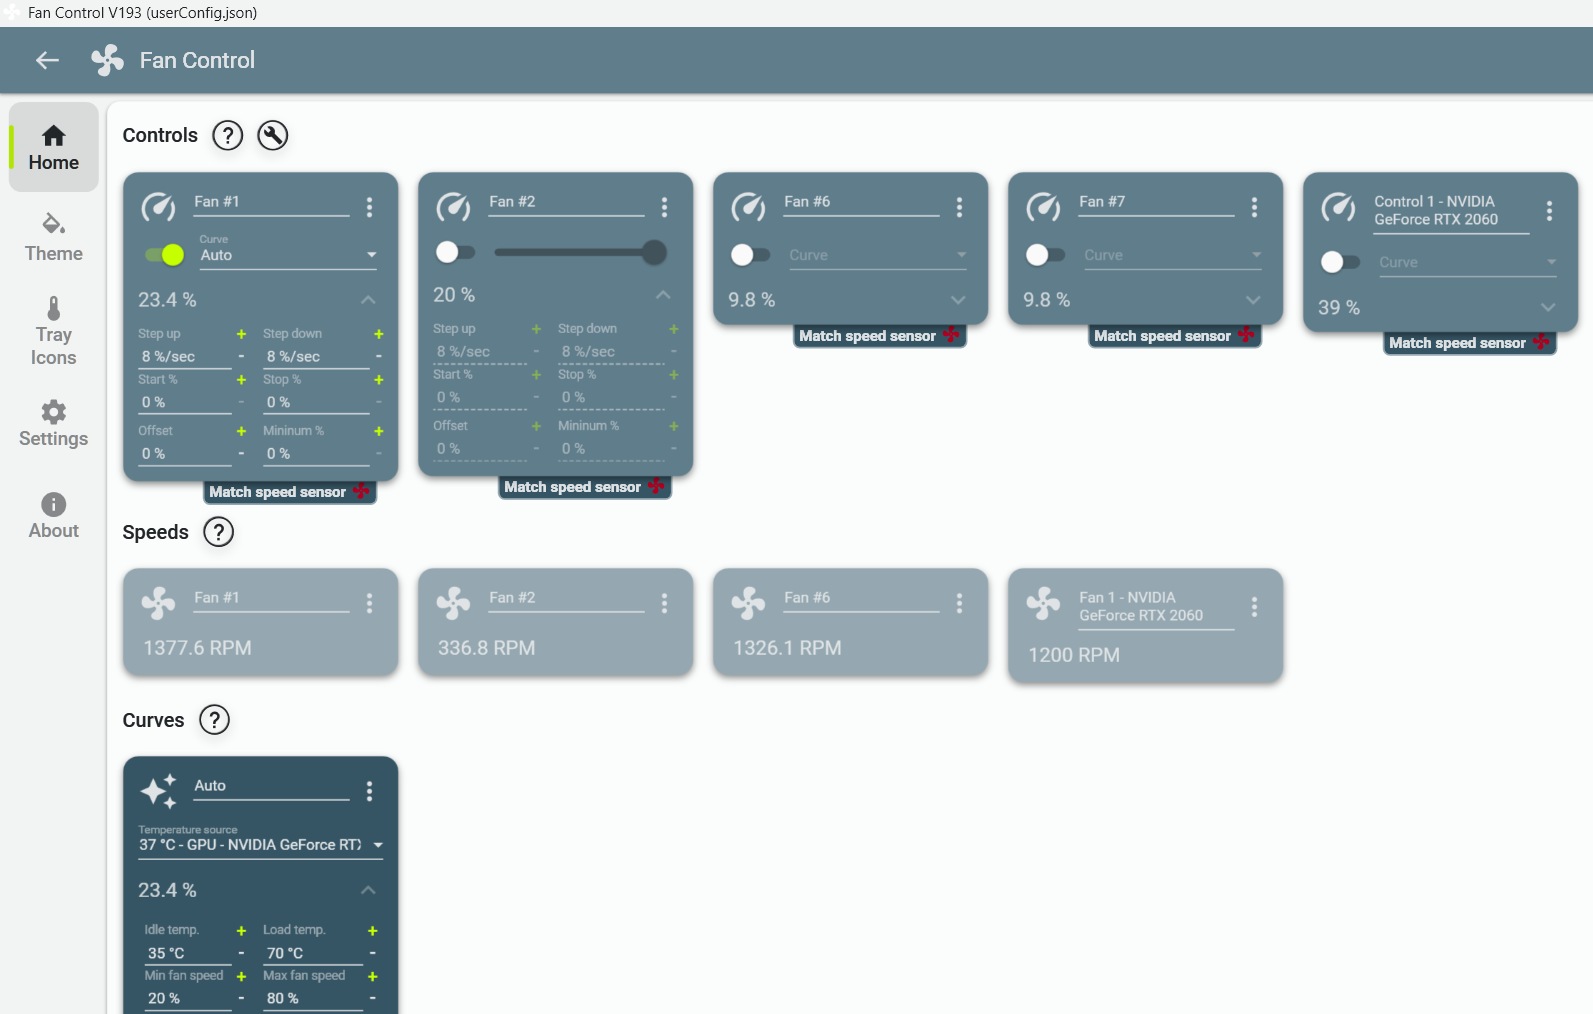
FanControl’s interface is organized into three panels: Controls, Speeds, and Curves.
When I started tweaking things I ran into two issues quickly:
- The case fans couldn’t be controlled by software while the CPU fan could.
- Two of the case fans were stuck at maximum speed, holding steady around 1350 RPM.
That explained the noise. I actually had four case fans installed originally — I’d already removed two, otherwise the noise would have been worse.
I checked the model: Arctic F12, 3-pin. They generally have good reviews. Many users note they’re quiet below about 1000 RPM but become noticeably loud above that. The problem wasn’t the fans themselves but the control method: these fans don’t support PWM. So it’s no surprise the motherboard settings had little effect.
Looking further in the BIOS, only one of the case fan headers supported DC control; the other option was missing. I haven’t opened the case to confirm, but it might be related to the connector. After some fiddling and saving the settings, the outer case fans became controllable. At that point, speed adjustments finally mattered.
Settings and Tuning
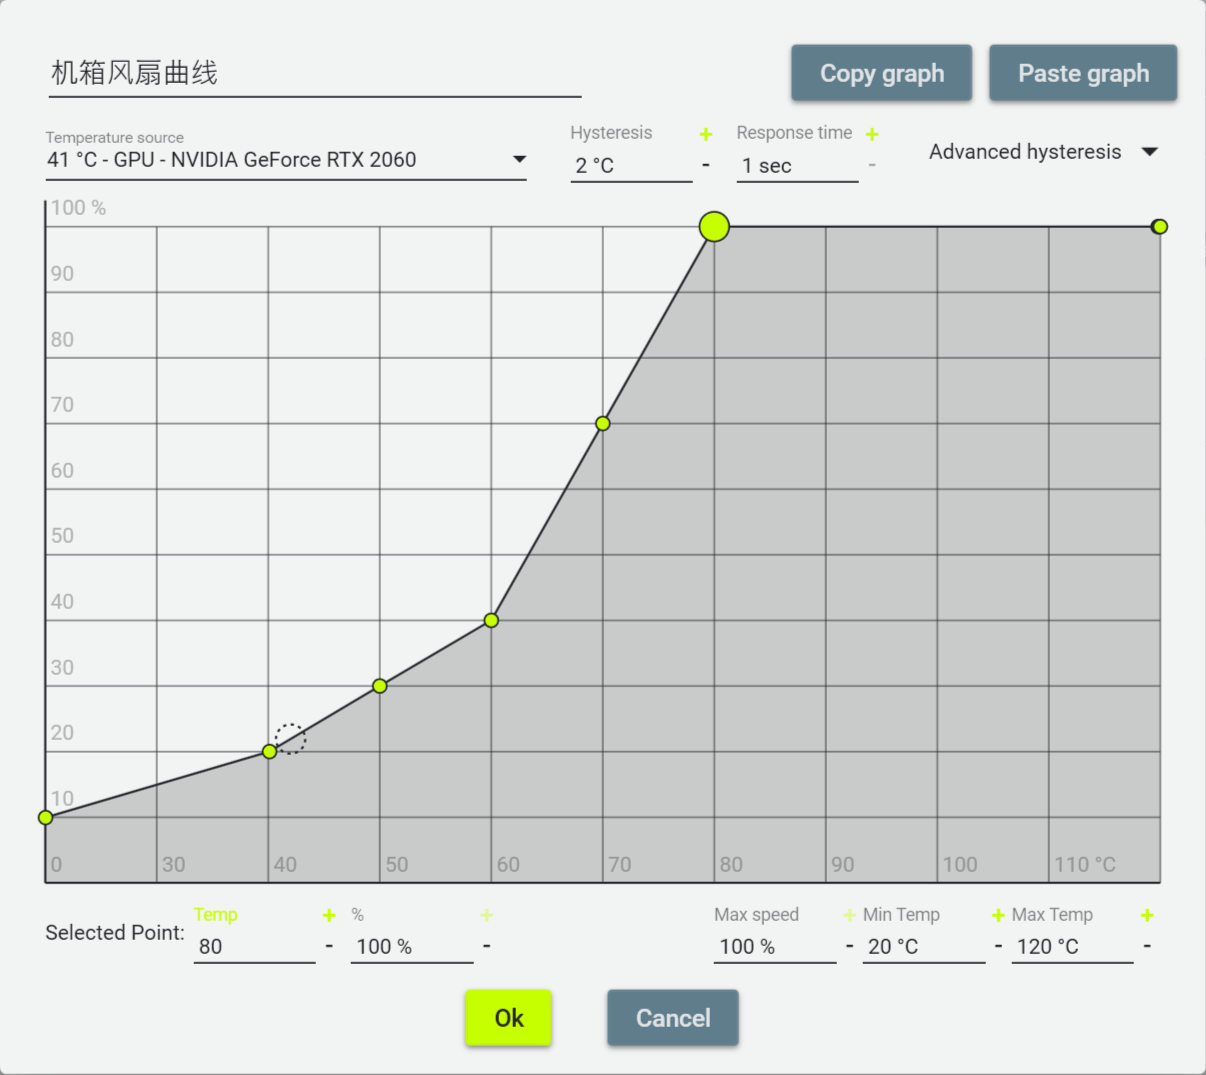
- Curves: This is where you define fan speed rules. On first launch Curves is empty, so add a new curve with the plus button in the bottom-right. Linear and Graph modes are intuitive.
- Hysteresis and Response time affect sensitivity; the defaults are fine.
- For Temperature source I set it to the GPU temperature — that’s the most representative heat source for case fans.
- I prefer Graph curves over Linear because they’re easier to reason about and tune:
- Low temps (CPU/GPU below ~40°C): fan speed 10–20% — keep noise to a minimum for light loads.
- Mid temps (40–60°C): fan speed 20–40% — handle normal use and light gaming with acceptable noise.
- High temps (above ~60°C): fan speed 40–100% — prioritize cooling under heavy load; the speed ramps up with temperature without demanding strict linearity.
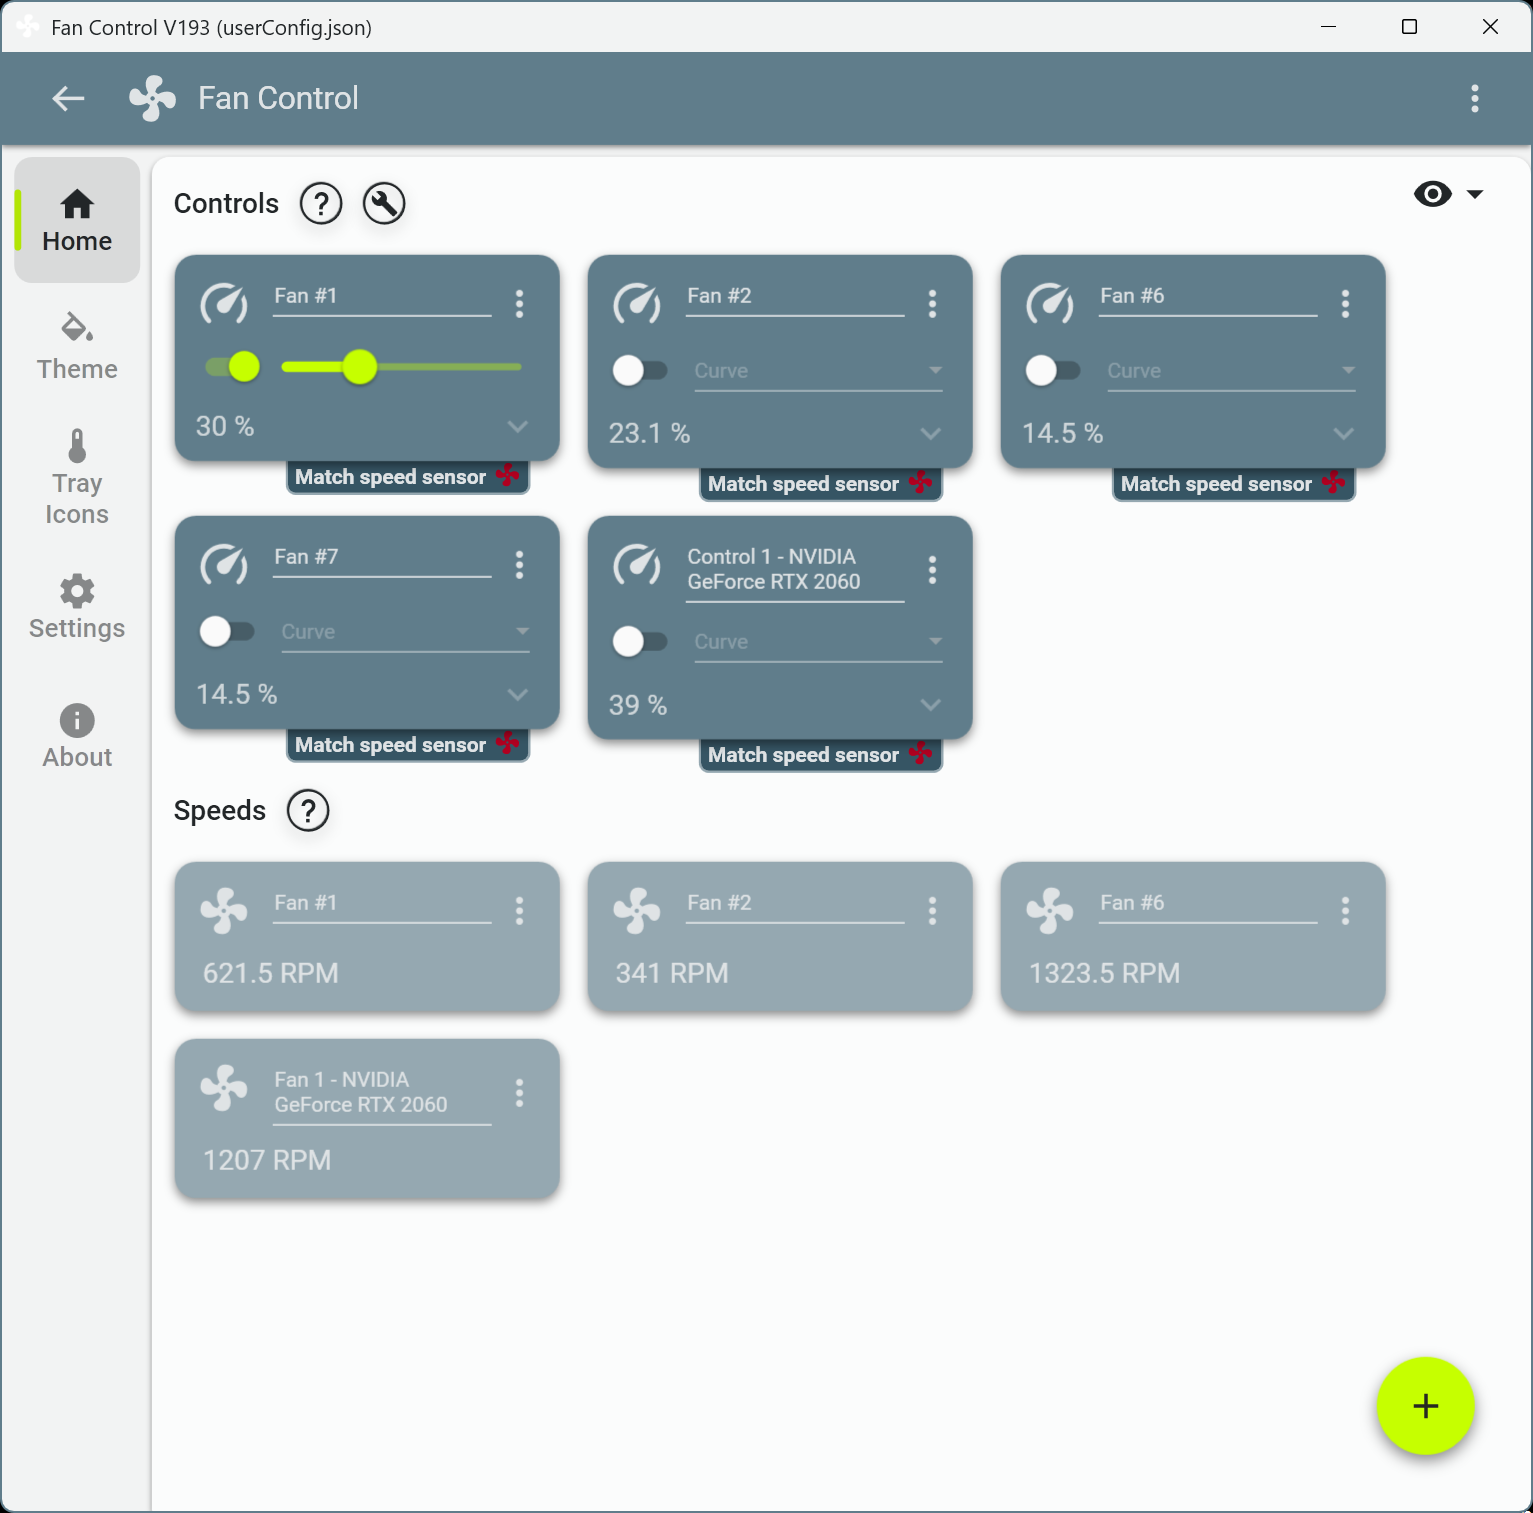
- Speeds: Lists all fans recognized by the system. They’re named Fan #1, Fan #2 by default and can be renamed to make identification easier.
- Controls: Binds fans to curves.
- Click the settings on a Control and use “Select matching fan” to assign a fan.
- Control options are straightforward: Enable toggles the control, Fan curve picks the curve, and Offset lets you fine-tune speed differences between multiple fans.
After these tweaks, my case fans no longer ran at full speed all the time. Fan RPMs now scale with load, and the noise level dropped back to a reasonable level.